Blog > Category: Car Paint Repair

Category: Car Paint Repair Blog

We’re here to help you learn how to get the best auto hail damage repair.
Because let’s face it, we can’t live without our cars (not easily at least).

Is Paint Protection Worth It On a New Car

Is Paint Protection Worth It On a New Car? Balancing the Pros & Cons

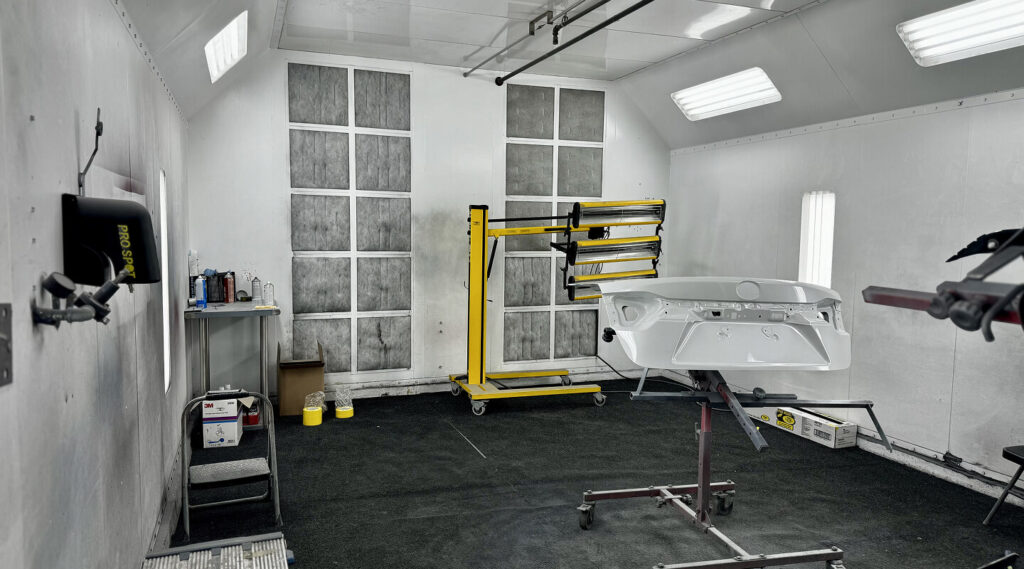
When it comes to maintaining the pristine condition of your new car, one question often arises: Is paint protection worth it on a new car? The straightforward answer is, absolutely. Investing in paint protection can be a wise decision for preserving your vehicle’s aesthetics and integrity over time.  In this article, we delve into the pros and cons of opting for paint protection, helping you make an informed decision on whether it’s the right choice for you. Pros of Paint Protection: Why You Should Get It   Preserves Vehicle Appearance – A significant benefit of paint protection is its ability to maintain your car’s showroom shine, ensuring it looks new for a long time. Protects Against Environmental Damage – Your car’s exterior is constantly exposed to harsh environmental factors such as UV rays, acid rain, bird droppings, and tree sap. Paint protection acts as a shield, minimizing damage. Prevents Paint Oxidation and Fading – Over time, paint can fade and oxidize due to exposure to the sun and air. A quality paint protection layer prevents this deterioration, keeping your car’s color vibrant. Enhances Resale Value – A well-maintained car, free from cosmetic flaws, can command a higher resale value. Paint protection is a key factor in achieving this preservation. Cons of Paint Protection: What Should You Expect   Initial Cost Considerations – The upfront cost of applying paint protection can be expensive, making it essential to weigh this investment against its long-term benefits. Limitations and Lifespan of Protection – While paint protection offers substantial benefits, it’s not a cure-all. It has limitations and requires periodic reapplication to maintain its effectiveness. Installation Challenges and Quality Assurance – The quality of the installation plays a crucial role in the effectiveness of paint protection. Poorly applied protection can lead to unsatisfactory results. False Sense of Invincibility – It’s important to understand that paint protection isn’t a guarantee against all types of damage. Regular maintenance is still crucial. Types of Paint Protection: Enhancing Your Car’s Durability and Shine When it comes to safeguarding your vehicle’s paint job, understanding the various types of paint protection available is beneficial. These protective layers not only enhance your car’s appearance but also contribute significantly to its longevity and resistance to damage. From traditional wax to advanced paint protection films, each method offers unique benefits tailored to different needs and preferences. Here’s a closer look at the options to help you decide which paint protection is best for your brand new car or SUV. Wax: The Classic Shine Enhancer Wax is a well-known form of paint protection that imparts a glossy finish, shielding your car’s exterior from dirt and grime. However, it’s important to note that wax coatings can be vulnerable to scratches, chips, and the harsh effects of chemicals, with their protection diminishing quickly under detergent use. Typically, wax lasts between two to four months, depending on weather conditions and your car wash frequency, making it a temporary solution for enhancing your vehicle’s shine and paintwork durability. Sealant: Durable Gloss and Protection Source: https://www.amazon.com/ Sealant provides a stronger bond to your car’s paint surface than traditional wax, offering up to six months of high-quality gloss and protection. Designed to outlast wax, sealants are engineered to shield the paintwork from environmental contaminants, though their effectiveness can also wane with regular exposure to adverse weather and frequent washes. Sealants are a step up for car owners looking for a balance between aesthetics and paint job durability without the constant upkeep of wax. Ceramic Coating: Long-Term Resilience For those seeking a more durable solution, ceramic coating offers a long-lasting protective layer. This liquid polymer chemically bonds with the vehicle’s paint, providing a robust shield against UV rays, road chemicals, and minor scratches. With proper care, a ceramic coating can preserve your car’s paintwork for up to four years, making it an ideal choice for enhancing both the vehicle’s appearance and its resale value. Its resilience and low maintenance requirements make ceramic coating a popular choice among car detailing enthusiasts. Paint Protection Film (PPF): Ultimate Armor for Your Car PPF stands out as the most durable form of auto paint protection. Made from thermoplastic urethane, it’s specifically applied to areas most susceptible to damage, such as the front bumper, hood, and side mirrors. While not typically used for full vehicle coverage, PPF excels in protecting against stone chips, tree sap, and scuffs, effectively preserving the showroom quality of your car’s paint job. Its self-healing properties and longevity make PPF an excellent investment for maintaining a brand-new car’s pristine condition. Making an Informed Decision Choosing the right type of paint protection for your vehicle involves considering your lifestyle, how often you drive, and the level of maintenance you’re willing to commit to. Whether it’s the ease of wax, the enhanced durability of a sealant, the long-term benefits of ceramic coating, or the unparalleled protection of PPF, each option offers a way to keep your vehicle looking its best. Before deciding on paint protection, consult first with a professional auto detailing service, which can provide personalized advice and high-quality application, ensuring that your car receives the best possible care and protection. In conclusion, Paint protection can be a valuable investment for your new car, offering benefits like preserving the vehicle’s appearance and enhancing its resale value. However, it’s important to weigh the initial costs against the long-term advantages and to consider the specific needs of your vehicle.  By doing thorough research and consulting with professionals, you can make an informed decision that ensures your car remains in top condition for years to come.  

Read More »
A technician applying a fresh coat of paint to a car during a professional paint job

How Much to Paint a Bumper: Your 2024 Guide to Cost-Effective Car Makeovers

Tired of looking at scratches and dents on your bumper? Bumpers are often the first casualty in daily vehicle wear and tear. We’ve researched the most cost-effective ways to get yours looking like new. Get straight to the point with the latest costs of bumper paint repair in 2024. Discover how much to paint a bumper and the best options available. By the end of this guide, you’ll not only be well-informed about the costs associated with painting your bumper but also equipped to make a choice that suits both your budget and your desire for a pristine vehicle appearance. Bumper Paint Repair Cost Bumper paint repair is an intricate process that requires careful consideration. The cost and complexity of painting a bumper can vary widely based on several factors, including the paint type, vehicle make and model, and the level of damage. Here’s what you need to know to make an informed decision. Professional Bumper Painting Costs: What to Expect When it comes to professional bumper painting, costs can range widely based on the quality of the job and the level of damage. On average, painting a front or rear bumper by professionals is estimated between $300 and $500. However, this cost can vary significantly from one auto body shop to another. Here’s a breakdown to help you navigate your options: Average Cost – Initially, expect to pay anywhere from $300 to $500 for a professional paint job on your bumper. This estimate serves as a starting point before delving into the specifics. Labor Rates – Auto body shops typically have labor rates ranging from $50 to $200 per hour. The complexity of the job and the shop’s reputation can influence this rate. Materials – The use of high-quality paints and materials is crucial for a lasting finish, contributing a few hundred dollars more to the overall expense. Budget vs. Premium Paint Jobs Cost Budget Repaints – For those looking to minimize expenses, budget paint jobs are available between $200 and $300. Be aware that these may involve lower-quality paints, potentially leading to mismatched colors and less satisfaction. Premium Paint Jobs – For a durable, professional finish, prices range from $500 to $1,000. This option is advisable for bumpers with extensive damage requiring additional bodywork, with costs possibly exceeding $2,000 for comprehensive repairs. Choosing between a budget and premium paint job involves considering both your aesthetic expectations and financial constraints. Premium services, while more costly, ensure a finish that matches the rest of your vehicle and withstands the test of time, offering better value in the long run. Vehicle Make and Model Impact Toyota: $100 to $500 Ford: $150 to $600 Chevrolet: $150 to $700 Honda: $200 to $600 Nissan: $200 to $700 Audi: $500 to $2,500 BMW: $600 to $1,000 Lexus: $600 to $1,100 Tesla: $700 to $1,500 Mercedes: $700 to $2,000 Land Rover: $800 to $2,000 DIY Bumper Painting Cost For minor chips, scratches, or scuff marks, a DIY bumper painting might be a cost-effective solution. Automotive paint and accessories can be sourced from online retailers, with bumper paint kits for light touch ups starting at around $80, and more comprehensive kits available for about $100 this includes sandpaper, base coat, clear coat, primer, latex gloves, drop cloths, protective goggles, and a mask.  Understanding Bumper Painting Costs: Key Factors The expense of getting a bumper painted is influenced by a lot of factors, each playing a crucial role in the final price tag. Here’s a breakdown of what affects bumper painting costs, guiding you towards making an informed decision whether you’re considering a DIY approach or professional service. Choosing the Right Auto Body Paint Shop The quality of the paint shop you choose is paramount. It’s essential to consult multiple experts to align your project’s specific needs with their offerings, ensuring the chosen shop meets your requirements for quality and durability. Type of Paint: Single-stage vs. Basecoat and Clear Coat The choice of paint plays a significant role in the cost: Single-Stage Paint: Combines color and protection in a single layer, making it quick to apply and budget-friendly. Ideal for a classic look on older vehicles, it has a lower initial cost due to simpler application and fewer materials. However, without a protective clear coat, it’s more prone to fading, oxidation, and damage, especially in harsh weather. While it’s cheaper upfront, it may require more maintenance in the long run, adding to overall costs. Basecoat and Clear Coat: Uses two layers—a base coat for color and a clear coat for protection. The clear coat shields the paint from UV rays, moisture, and debris, keeping the color vibrant and glossy over time. Although it has a higher initial cost due to additional materials and labor, it offers greater durability and UV protection, reducing the need for frequent maintenance. This makes it a preferred choice for a long-lasting, high-quality finish. Extent of Damage The severity and extent of the bumper damage directly impact the price. Minor damages requiring no bodywork can be fixed at a lower cost. Conversely, extensive damage demanding significant bodywork will escalate the expenses. Location of Repair Where the repair work is carried out also influences the cost. Professional auto body shops equipped with specialized tools and skilled technicians generally charge more than a DIY garage setup due to the higher quality of work and guarantees they offer. Labor Costs The labor involved in repainting a bumper — from removal and surface preparation to painting and reinstallation — contributes significantly to the overall cost. Professional services account for these steps with a detailed labor charge. Additional Costs for Custom Finishes and Specialty Paints Opting for custom finishes or specialty paints can significantly increase the cost. For example: Tri-Coat Paints – More expensive due to a three-layer application, offering depth and luster. Costs typically range from $750 to $2,500 depending on the color and vehicle size. Custom Colors – Higher costs arise from unique paint mixing and the labor-intensive application process. Prices for custom color paint

Read More »
How to fix peeling paint on car

10 Effective Ways How to Fix Peeling Paint On Car

Staring at the peeling paint on your car can feel like watching money flutter away with the wind. It’s not just an eyesore; it’s a cry for care. But don’t worry! We’ve cracked the code on how to turn this common headache into a triumph of transformation. This guide is your secret weapon, packed with 10 ingenious, wallet-friendly fixes. You’ll gain insider knowledge on how to fix peeling paint on car and learn when to seek professional assistance. What Causes Paint to Peel on Cars? Car paint peeling, often a result of environmental elements like UV rays and rain, is further exacerbated by chemical contaminants and physical impacts such as dents and scratches. Understanding these causes is crucial for effective automotive paint repair and maintenance. 10 Effective Ways How To Fix Peeling Paint On Car 1. Use DIY Repair Kit DIY solutions are often the first line of defense against peeling paint. A typical DIY repair kit, complete with instructions and tools, is an excellent start for small area touch-ups. However, it’s important to note that DIY repairs are not advisable for bigger dents, as they can lead to further damage if not handled professionally. This cautionary advice might be best positioned in the middle or at the bottom of the discussion to emphasize the limitations of DIY methods. 2. Paintless Dent Repair (PDR) PDR, a pro method, targets dents and dings without compromising the original paint job, maintaining the car’s aesthetic and structural integrity. 3. Vinyl Wrap Vinyl wraps not only protect the original paint from further damage but also offer a fresh look. They act as a barrier against environmental factors and physical damage. 4. Using High-Quality Paint Product Invest in professional paint, clear coat, and base coat products to ensure long-lasting adhesion and finish. High-quality automotive paint reduces the likelihood of future peeling and flaking. 5. Whole Car Repainting For extensive damage, a complete repaint might be necessary. This involves removing the affected area‘s paint, priming, and applying new paint for a nice, refreshed look. 6. Apply Clear Coat A fresh layer of clear coat can add a layer of protection against UV rays and contaminants, reducing the risk of peeling clear coat and paint chips. 7. Wet Sand and Polish Wet sanding the damaged area with grit sandpaper followed by polishing can remove flaking paint and prepare the surface for a new layer of paint or clear coat. 8. Regular Car Wash and Wax Maintaining your car with regular washes and wax applications can prevent contaminants from damaging the paint and leading to peeling. 9. Paint Chip and Scratch Repair Addressing paint chips and scratches promptly with touch-up paint or a spray can prevent the affected area from worsening. 10. Consult a Body Shop For extensive damage, consulting a professional at a body shop ensures a comprehensive repair, especially when dealing with delamination or the need to repaint the entire car. Prevention and Maintenance Tips A stitch in time saves nine, especially when it comes to your car’s paint job. Learn how to fix peeling paint on car with proper maintenance techniques. Start by incorporating regular inspections into your routine, you can catch and address paint peeling, flaking, or cracking before it escalates. Use a microfiber cloth during washes to gently clean without scratching, and always dry your car thoroughly to prevent water spots and rust. Protecting your car from harsh UV rays with car covers or parking in the shade can also prevent the paint from fading and peeling. Additionally, applying a good quality wax or sealant provides a protective layer against environmental contaminants, ensuring your automotive pride stays polished and pristine. Remember, prevention is not just about preserving the paint; it’s about maintaining your car’s value and appeal. Signs That It’s Time to Seek Professional Support While a DIY approach can be effective for minor issues, certain signs indicate it’s time to hand over the reins to a pro. If you notice extensive peeling clear coat, large areas of flaking, or exposed bare metal, these are critical red flags. An auto body specialist can assess the affected area and provide a professional paint repair or complete repaint, ensuring proper adhesion and a flawless finish. They have access to high-quality automotive paint, tools, and techniques like color matching and priming that go beyond the capabilities of a typical DIY job. By seeking professional support, you’re investing in a durable and aesthetically pleasing solution, ensuring your car looks its best and preventing future paint problems. In Summary Fixing car paint chips requires a mix of preventative care and effective repair techniques. Whether you handle a small chip with a DIY approach or seek professional assistance, addressing the root causes ensures your car stays in top condition. For detailed guides or expert support, explore our tutorials or contact a professional today. For professional car paint repair in Denver, you can rely on StormWise. Our team is dedicated to providing expert repairs, ensuring high-quality results and a smooth process from start to finish. Contact us today to get your car looking like new again!

Read More »
Person sanding a car

How to Remove Deep Scratches From Car At Home (DIY Guide)

Ever spotted a deep scratch on your new car and felt a wave of frustration? It’s a common yet disheartening experience for many car owners. Your vehicle is more than just a means of transportation; it’s a prized possession that reflects your personality. Such scratches are not just unsightly—they can also devalue your beloved car. This guide will help you navigate car care, turning frustration into relief. We’ll demonstrate simple, DIY methods on how to remove deep scratches from car at home, ranging from basic touch-up pens to comprehensive scratch repair kits. These techniques are easy to follow and use common household items, offering an effective, cost-efficient way to restore your car’s appearance at home. Method 1: Using a Touch-Up Paint Pen A touch-up paint pen is ideal for minor scratches that haven’t reached the bare metal, particularly those affecting only the clear coat or slightly penetrating the base coat. Here’s how to use it effectively: How to Remove Deep Scratches From Car Using a Touch-Up Paint Pen: Clean the Area: Wash the scratched area thoroughly with car wash soap to remove any dirt and debris, as this helps the paint adhere better. Dry Completely: Use a microfiber cloth to dry the area thoroughly. Any moisture left can affect the paint’s application. Prepare the Paint Pen: Shake the paint pen according to the manufacturer’s instructions. This ensures the paint is evenly mixed. Apply the Paint: Carefully apply the paint pen over the scratch, using light, even strokes. Apply the paint in thin layers rather than thick coats. Let It Dry: Allow each layer to dry fully before applying the next, following the manufacturer’s drying time recommendation. Multiple thin layers will create a more natural finish and help avoid clumping. Finish and Inspect: Once dry, inspect the repair. For a smoother finish, you may lightly buff the area with a microfiber cloth to blend the new paint with the surrounding area. This method works best for small, shallow scratches where the metal underneath is not exposed. Method 2: Using a Scratch Repair Kit Scratch repair kits, widely available at auto stores, are versatile solutions for scratches of various depths. They typically include a scratch-removing compound, a buffing pad, and sometimes a polish or wax for finishing. How to Remove Deep Scratches From Car Using a Scratch Repair Kit: Clean the Scratched Area: Start by washing the area with car wash soap to ensure it’s free of dust and debris. Apply the Compound: Using a microfiber cloth or the buffing pad provided, apply the scratch-removing compound to the scratch. Use a circular motion, applying even pressure to help blend the scratch with the surrounding paint. Buff the Area: Once the compound is applied, gently buff the area with the pad or cloth provided. This will help smooth out the scratch and restore the shine. Apply Polish or Wax: If the kit includes a polish or wax, apply it to the treated area for additional shine and protection. This will also prevent future scuffs and scratches. This kit is effective for both light and moderate scratches. Method 3: Using Car Polish for Minor Surface Scratches Car polish, an ideal solution for light scratches, typically contains mild abrasives that gently smooth out imperfections in the automotive paint. For minor scratches and small scratches on your vehicle, select a car polish that is compatible with your vehicle’s paint job.  How to Remove Deep Scratches Using Car Polish: Prepare the Polish: Select a polish compatible with your car’s paint. Use a small amount on a microfiber or soft cloth. Apply Polish to the Scratch: In a circular motion, rub the polish into the scratch. The mild abrasives will gradually wear down the edges of the scratch, making it less visible. Buff with a Clean Cloth: After applying the polish, use a clean section of the cloth to buff the area. This will help blend the polish with the surrounding paint and restore a seamless shine. This method is suited for minor surface-level scratches that don’t penetrate the clear coat deeply. Method 4: Wet Sanding and Polishing for Deeper Scratches For scratches that reach the base coat or expose bare metal, wet sanding followed by polishing is an effective method, though it requires careful attention to avoid further damage. Steps to Remove Deep Scratches From Car Through Wet Sanding and Polishing: Select the Right Sandpaper: Use 2000-grit sandpaper for deeper scratches and 3000-grit for a smoother finish. Wet the Sandpaper: Soak the sandpaper in water to reduce friction and prevent paint damage. Sand the Scratch: Gently sand the scratched area in a back-and-forth motion, keeping the sandpaper wet. Avoid circular motions, as this can create uneven sanding. Switch to Finer Grit: Once the scratch begins to level with the surrounding paint, switch to 3000-grit sandpaper for a finer finish. Clean the Area: Rinse and wipe down the area to remove any sanding dust. Polish the Sanded Area: Apply car polish to a clean cloth and polish the sanded area to restore shine. Seal with Wax: Finish with a layer of car wax to seal the repair, adding an extra layer of protection. This method is best for scratches that go deeper than the clear coat. Method 5: Using Rubbing Compound for Severe Scratches Rubbing compounds contain coarse abrasives suitable for severe scratches that are visible but don’t expose bare metal. When used correctly, rubbing compounds can help restore a smooth finish, remove noticeable imperfections, and prepare the surface for finer polishing. How to Remove Deep Scratches From Car Using Rubbing Compound: Clean and Dry the Area: Start with a clean surface to ensure the compound adheres properly. Apply Rubbing Compound: Place a small amount on a microfiber cloth or applicator pad. Buff the Scratch: Rub the compound onto the scratch in a circular motion, applying consistent pressure. Remove Excess Compound: Wipe away any excess with a clean cloth and inspect the area. Polish for Shine: For a smooth finish, apply a car polish after the compound

Read More »
Bumper Scratch Repair Cost

What Affects Bumper Scratch Repair Cost? [7 Things to Check]

Have you ever returned to your car in a parking lot only to find a new, unsightly scratch on your bumper? You’re not alone. Bumper scratches, whether on the front bumper or rear bumper, are an almost inevitable part of car ownership.  Agreeably, they’re more than just a visual annoyance; they can be early indicators of more extensive damage if left unaddressed. In this comprehensive guide, we promise to uncover the various factors that affect bumper scratch repair costs, including insights from auto body shops and repair shops. We’ll dive into the average expenses you might face, explore the impact of different car models, including SUVs, and examine other crucial aspects like material, labor, and location.  Plus, we’ll offer practical tips on how to minimize these costs in the future with DIY solutions and professional help. So, buckle up as we bridge your concerns with solutions and navigate the world of bumper repair costs together! Jump here: How Much do Bumper Scratch Repair Cost on Average Factors Affecting Bumper Scratch Repair Cost Extent and Depth of Damage Bumper Material and Car Mode Paint Matching and Customization Labor and Expertise Required Geographic Location Insurance and Warranty Considerations Type of Repair Technique Used How to Reduce Your Bumper Scratch Repair Costs? In Summary How Much do Bumper Scratch Repair Cost on Average The average cost for bumper scratch repair, whether it’s a light scratch or a deep scratch, varies based on the severity of the damage and the type of vehicle. For minor surface scratches, costs can start around $120 for sedans and may go up to around $170 for larger trucks.  For more extensive paintwork damage, such as deep scratches, repair costs can range from approximately $400 for sedans, with higher costs for SUVs and trucks. Below are the average costs for different types of vehicles and levels of scratch severity: Light Surface Scratch Repair: Sedan: Approximately $115 SUV: Approximately $130-$150 Truck: Approximately $150-$170 Paintwork Damage Scratch Repair: Sedan: Approximately $195 SUV: Approximately $220-$240 Truck: Approximately $250-$270 Deep Paintwork Scratch Repair: Sedan: Approximately $390 SUV: Approximately $420-$450 Truck: Approximately $470-$500 Alloy Wheel Scratch Repair (per wheel): Sedan: Approximately $115 SUV/Truck: Approximately $120-$140 Factors Affecting Bumper Scratch Repair Cost The cost of repairing a bumper scratch, be it on a plastic bumper or a metal bumper, is influenced by a variety of factors. Understanding these can help you better anticipate the expenses involved. Let’s explore these factors in detail: 1. Extent and Depth of Damage The severity of the scratch, whether it’s light scratches or deep scratches, is a primary determinant of the repair cost. Minor surface scratches, affecting just the clear coat, are generally less expensive to repair, often requiring simple buffing or minor touch-ups.  However, deep scratches that expose the metal or underlayers of the car call for more involved repairs, including sanding, filling, and a complete paint job, leading to higher costs. These deeper repairs often involve additional steps like primer application and protective clear coat finishing to ensure durability. 2. Bumper Material and Car Mode The type of bumper material and car model, whether it’s an SUV with a plastic bumper or a sedan with an OEM bumper cover, influences the repair method and cost. Plastic bumpers, common in modern cars, are typically cheaper to repair than metal or fiberglass bumpers.  Luxury vehicles, or those with aftermarket bumper designs, may need specialized repair techniques, increasing the bumper repair cost. In cases of minor dents or scrapes, repair shops may recommend bumper replacement as a more cost-effective solution. 3. Paint Matching and Customization For seamless bumper repair, matching the car paint perfectly, especially in the case of paint scratches, is essential. This task is complex for cars with custom paintwork or unique finishes like metallic or matte.  Utilizing advanced color-matching technology and skilled labor for this paintwork can increase the overall repair cost. This customization is particularly important for maintaining the car’s resale value and aesthetic appeal. 4. Labor and Expertise Required The price is also influenced by the labor costs and expertise required for the repair. Complex repairs, demanding high precision and expertise, will be more expensive.  Auto body repair shops with highly trained professionals may charge more, but typically deliver repairs that are cost-effective in the long term due to their quality. Frequent training and certification in the latest repair techniques are hallmarks of a reputable auto body shop. 5. Geographic Location Bumper repair costs also vary based on geographic location. In urban areas with higher living costs, higher labor rates lead to more expensive repair services. In contrast, areas with lower living costs generally have more affordable repair prices. Accessibility to specialized auto body repair facilities can also influence the price in different regions. 6. Insurance and Warranty Considerations When a repair is covered by car insurance or falls under the car’s warranty, it can significantly reduce the out-of-pocket expense. However, variables like the insurance deductible, the specifics of the car insurance policy, and warranty terms are important to consider.  Consulting with the insurance company and reviewing warranty details are crucial steps to understand coverage extent. An insurance claim for bumper damage might be a viable option if the repair cost exceeds the deductible. 7. Type of Repair Technique Used The chosen repair technique, be it traditional methods like sanding and repainting, or modern methods like paintless dent repair (PDR), also significantly impacts the cost.  The appropriateness of these methods for bumper scratch repair largely depends on the type of damage and the severity of the scratch. PDR is particularly effective for small scratch repair, offering a quicker and often more affordable solution. How to Reduce Your Bumper Scratch Repair Costs? Preventative Measures: Regularly washing and waxing your car can prevent many scratches. Maintenance Tips: Immediate attention to small scratches can prevent them from worsening. Professional Help: Opting for professional repairs from an auto body repair shop can sometimes be more cost-effective in the long run. In Summary Bumper scratch repair costs can vary significantly

Read More »
do-it-yourself car paint scratch repair

10 Quick Do-It-Yourself Car Paint Scratch Repair Solutions to Try

Ever been lost in the beauty of your car’s paint, only to spot an unexpected scratch? It’s like a mini heartbreak for car lovers everywhere. I’ve been there and can relate to that sinking feeling. But before you rush off to the nearest body shop, take a deep breath.  Believe it or not, there are some handy do-it-yourself car paint scratch repair that can come to the rescue. Dive in, and let’s explore easy and cost-effective ways to tackle those pesky scratches from the comfort of your garage. How Your Car Paint Can Get Scratches Natural Elements: Hail might cause dents and paint scratches; wind-driven debris can mar the clear coat. Additionally, tree sap and bird droppings, if not promptly addressed, can eat into the paint job. Human Factors: Careless parking, perhaps when someone else doesn’t know how to respect the space, can cause car paint scratches. Accidental brushes with sharp objects, or a simple fingernail can also be culprits. Road Factors: Traveling on gravel roads might have stones flying, causing deep scratches on the car’s paint job. Road debris, more often than you’d like, also contributes to the car’s wear and tear. Others: Vandalism, curious animals, or just the typical wear and tear can be detrimental to your vehicle’s paintwork. 10 DIY Scratch Repair Solutions   #1. Toothpaste Method What is it? The toothpaste method involves taking regular toothpaste, preferably the whitening kind, and rubbing it over the scratched area in a circular motion with a clean cloth to diminish its appearance. When is the best time to use it? This method is best suited for minor surface scratches that haven’t delved deep into your car’s paint job. Pros and cons: Pros: Available in most households, cost-effective, simple to use. Cons: Might not yield results for deeper scratches. #2. Clear Nail Polish Method Image source: https://ecosportdiyseries.com/tutorials/fixing-paint-scratches-with-nail-polish/ What is it? A DIY technique utilizing clear nail polish to fill in and cover paint scratches, acting as a protective seal over the damaged area. When is the best time to use it? For those minor surface scratches or small blemishes that merely affect the clear coat. Pros and cons:  Pros: Acts as a temporary filler, clear, so it blends with the rest of the car’s color.  Cons: Not a long-term scratch repair solution, may peel off affecting the car’s paint job over time. #3. Baking Soda Solution Method Image source: https://plantcaretoday.com/7-ways-use-baking-soda-cleaning-car.html What is it? A household remedy where baking soda is mixed with water to create a paste, then applied in a circular motion over the scratched area using a microfiber cloth. When is the best time to use it? For mild automotive paint scratches, especially on darker paint where the white residue won’t be noticeable. Pros and cons:  Pros: Natural, cost-effective, a common item in most households. Cons: Can leave a residue, might not be effective for deeper scratches or gouges. #4. Car Scratch Repair Kits Method What is it? An all-in-one car scratch repair kit, commercially available, designed for scratch removal to ensure your car’s paint job remains intact. When is the best time to use it? For various paint scratches, from light scratches to some deeper ones, depending on the kit’s specifications. Pros and cons:  Pros: Comprehensive DIY solution, often includes color-match touch-up paint.  Cons: More expensive than other DIY methods, results may vary based on the brand, and the car’s color matching can be tricky. #5. Magic Eraser Method Image Source:  https://bloomartys.co.uk/products/deep-car-scratch-remover-pen What is it? Using melamine foam, commercially known as Magic Eraser, to buff out paint scratches and scuffs on the car’s surface. When is the best time to use it? For superficial paint blemishes and minor paint transfers on the car’s paintwork. Pros and cons:  Pros: Effective for certain types of automotive blemishes, easy buffing method.  Cons: Abrasive; can harm the clear coat if used too aggressively. #6. Candle Wax Method What is it? In this DIY method, softened candle wax is applied to the scratched area, acting as a temporary protective sealant for the car’s paint job. When is the best time to use it? For minor scratches, especially on the clear coat, to prevent rusting or further damage. Pros and cons:  Pros: Provides a temporary seal, prevents rusting, and is a quick fix for small scratches.  Cons: Not a permanent solution, wax might not withstand a car wash and can be washed away. #7. WD-40 Method Image source: https://www.amazon.com/WD-40-Multi-Use-Product-Smart-Sprays/dp/B084CQ4R8L What is it? Using WD-40, a versatile lubricant known in most automotive circles, to reduce the visibility of surface scratches and scuffs. When is the best time to use it? For minor scratches on the car’s paint job to clean and minimize their appearance. Pros and cons:  Pros: Multi-use product, easily available, effective for certain marks.  Cons: Temporary scratch removal product; may require reapplication. #8. Sandpaper Technique What is it? A DIY method where fine-grit sandpaper is used to wet sand and smooth out deep scratches on the car’s surface before applying touch-up paint. When is the best time to use it? For deeper scratches that penetrate the clear coat or base coat.  Pros and cons: Pros: Can effectively smooth out deeper imperfections, prepares the surface for a touch-up paint job.  Cons: Requires some know-how and care; improper technique can worsen the damaged area. #9. Touch-up Paints Method Image source: https://www.istockphoto.com/photos/car-paint-correction What is it? Using specially formulated touch-up paint that matches your car’s color to cover and fix paint scratches.  When is the best time to use it? After sanding deeper scratches or for spots where the base coat or clear coat is entirely gone.  Pros and cons:  Pros: Provides a color-matched finish, a more permanent solution than a temporary filler.  Cons: Matching the exact shade can be challenging; application requires precision and skill. #10. Clay Bar Method Image source: https://www.amazon.com/Premium-Detailing-Adsorption-Capacity-Cleaning/dp/B09YQFV93T What is it? A method where a specialized clay bar, often used in body shops, is used to pick up and remove contaminants from the paint surface, often reducing the appearance of

Read More »
StormWise Insurance Help

Insurance Navigation

We work with all reputable insurance companies and will help take care of your claim, inspection, and deductible.

StormWise Satisfaction Guarantee

100% satisfaction guaranteed

Rest assured with a free estimate, a free rental car, and a lifetime warranty. We can arrange free car pickup or delivery, too!

StormWise Expert Advice

Expert Advice

Ask any questions you have about automotive hail repair and our process. You can also get an estimate via online chat.

Contact StormWise To Get Your Car Dent-Free